

Vault of Night
Board
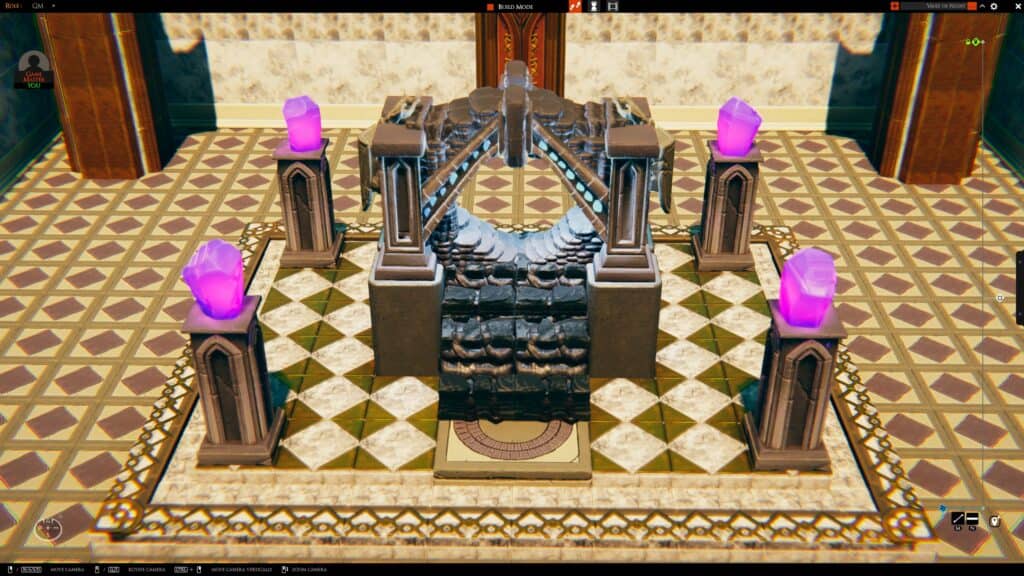

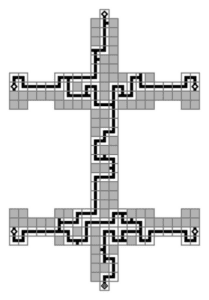
I’ve always been very fond of Vault of Night so I recreated it the best I can, in the pictures you can find the solution to the east side floor puzzle, I used modern lights and turn them into creatures and then gave the players permission to move them to try and solve the puzzle. Side note I applied the effects of the undermountian from the mad mage campaign to prevent any alter terrain effects such as mold earth so the players can’t just “skip” everything because I like the idea of the place being in a volcano. Also disintegrate effects doesn’t work on the forcefields as they’re being powered.
Each wing has a speaking stone with a face that has a rune engraved onto them, the players will need to interact with them but is locked down by central command which is in the north wing boss section but will need a ring from Otto Knucklebones who is the west wing boss to disable central command forcefields. The south wing is locked with no way of entry. I’ll explain step by step starting with the West.
West wing: First room is just showcasing power circulating through the dungeon, the second room is trapped and the right side has the panel to disable it, the trap is in between the walls being blades. The next room is the same as the first. The next room after that (admittedly I made too big but meh) is a large room, you’ll see a rope attached to the wall for emergencies in case your players or any creatures you place destroys the stairs it’s mostly made for the enemies in case something happens.
At the bottom they’ll see a speaking stone with a chest next to it with scrolls of flying inside, players are to memorize the rune etched on the stone face then move back up and proceed to the next room which is the same as the first room. The next room are filled with forcefields the corner rooms have deactivated golems, the center of the room is an adamantine cylinder, we’ll return to that when they get it.
The players continue forward and open the door where they find Otto Knucklebones or whoever you decide to have in place, they’ll need his arcane signet ring. If the players decide to do an investigation check and they’ll noticed a button under the desk, pressing it will revel the hidden side room, it’s trapped so the players will need to disable all 5 pillars or be hit with lightning bolt with every pillar that’s not disabled. Once having the ring they’ll need to proceed to the East Wing.
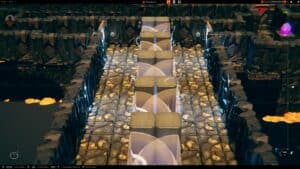
East Wing: Nothing worth to note for the first couple of rooms, the 3rd room they’ll noticed a locked door they’ll need to pick open to the east they’ll see another speaking stone face with a different rune etched onto it, the portcullis to the north is closed at this time making south their only destination. Once they discovered the puzzle room they’ll need to get both left and right sides powered to disable the forcefield in the middle of the room, once they have all 5 connected the forcefields in that room drops allowing the players to see clearly what the rune they’ll need to see that is etched into the speaking stone face.
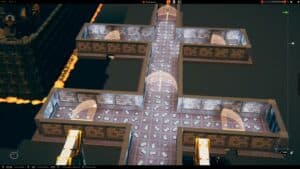
North Wing: The first room is trapped, players will need to make dex saves against each time they go past the lightning trap and then another set of traps that are buried in the ground, the spinning blades that are in between each lightning trap will only stop when the panel are disabled, at the end of the room there are 3 objects on each side, levers requires strength, rune requires wisdom/intellect and the pipes needs to be shot through a hole ( The arrow will be spit out once it’s been hit.) can be used with dex or just roll for attack and they all need to be done at the same time. At this point they have one turn to go through the door or it’ll close forcing them to redo the process, if one person does make it through and the others for some reason haven’t there’s a lever on each side that’ll open the doors up for one turn.
Your party is split from this point and the next main room are the two bridges. The left side will need to have one person to jump over and pull the lever or a mage hand if they have it and it’ll lower the forcefield for one turn. ( I made this part easier by having Otto ring a ring of telekinesis but in case your players did not get it by then you can instead have a mini boss on the left side of the bridge that will drop a ring of telekinesis. ) To disable the right side bridge forcefield they’ll need both levers pulled at the same time to lower it for one turn, left side last forcefield can be lowered after pulling the 2nd lever alone.
The next room with the pillar if party noticed the levers and tried to interact with them nothing happens and the door leading into the big room remains locked, only if both levers pulled from both pillars at the same time will unlock the doors but doing so will lower the forcefield on the right side activating a pair of golems. Once they’re in the large room the left party can lower the ladder to allow the 2nd party to reunite with them. They’ll encounter the north wing boss in the marbled room. The person with the arcane signet ring will automatically lower the forcefields when being close to the wheels, each wheel have 8 different runes, if the players take note what the runes were on the stone faces they can set each wheel to the corresponding rune needed to communicate with the speaking stone faces. Speaking to the stone face in the marbled room will allow you to disable the lightning traps and reroute power from the north wing to the south wing. All forcefields in the north wing are gone and when players go back to the center they’ll see the crystals glowing a little bit.
West Wing 2: If the players goes back to the west wing and speak to the speaking stone face they can reroute power to the south wing, disabling all of the forcefields in the east wing which allows them to get the adamantine cylinder back before you encounter Otto, they cannot open it as it’s sealed shut unless they get a high investigation roll they’ll not notice the trap and upon grabbing the cylinder will activate golems to give chase, there are 4 – 8 golems ( you get to decide how many). Again the center room crystals gets brighter
East wing 2: They’ll need to speak to the puzzle room stone to reroute power to the south wing allowing the portcullis to rise and the forcefields to be lowered and it can stop production of golems as well as deactivate any remaining golems in the north, east and west wing, the stone face in the lava room will tell the players it’s there to dispose trash and asks if the players have anything they wish to remove, if the players say yes the floor will open up allowing the players to drop the cylinder in, the adamantine slowly melts away exposing an iron key which has runes engraved on the side which at this point is brimming red hot ( Funny thing, Dwarves know the secret of getting adamantine to melt with lava while it takes other races to use magical fire at a much, much higher temperature and iron doesn’t melt in lava temperature. I added this bit just in case people thinks I’m stupid. The more you know!) After getting the iron key either with mage hand, the ring or someone reaches in and grab it they’ll be able to open the door to the northern section of the east wing (It for some reason is unpickable, no idea why so my excuse was the exterior part of the door is made of anti magic save for the keyhole but the interior had warding allowing only the key to be able to go in.)
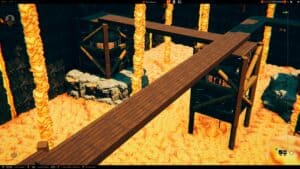
Entering the lava filled room players can see planks on one platform onto another, you can add whatever you like here if you want a mini boss or trash mobs but after that room the players will start fighting rust monsters if the players are wearing any kind of metal they’ll try to eat it off them, at the end there’s a giant rust monster with a crystal key on the ground after making a mess of the iron ore in the storage. When your players goes back to the main room the crystals are brimmingly bright and the south door is unlocked.
South Wing: Players will see the pipe in the middle spewing fire, they need to go below and turn all 4 levers at the same time, they’ll notice there is cool air pressing down at them from above, after they pulled all 4 levers and if they’re not moving within one turn they’ll be spewed with fire. They have 1 minute to get someone onto the pipe and launch them towards the balcony to lower the ladder for the rest of the party, the lighter they are the better it is for them. lowering the ladder will activate floor traps spinning blades unless they disabled it prior by the panel to the far side.
This time they’ll need someone to pull the lever and will be launched across the room but they’ll land fine depending how heavy they are, they’ll be able to move up and eventually lower the ladder. The next bit they just need to shoot the levers to lower the bridge, the bridge is hidden so be sure to disable that when they succeeded. After that they need to use the crystal key from the giant rust monster room to open the remaining doors which again they’re trapped from the same floor traps from before and after that they’ll be in the clear in fighting the main boss in the vault of night!
I hope this dungeon gives you and your players a lot of fun!
Wow, that’s amazing dude. Great job!
Thanks!